How to remove a color cast
(alternative method)
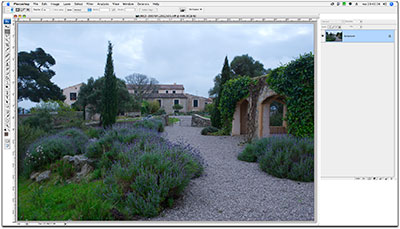
 Sometimes an image can have a color cast that is very hard to determine. Especially if you do not know any area in the image that should be neutral grey, it can become hard to correct such a cast, even using the first method described on this site. In that case you can use an alternative method, which is based on the fact that the average of all pixels in a neutral image should normally also be neutral. This method works on most images.
 Step 1:
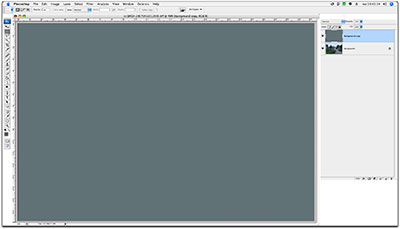
Make a copy of the image in a new layer by dragging the background layer onto the ‘New Layer’ icon. Then use ‘Filter – Blur – Average’ on this layer. You will get an plainly colored layer, the color of the layer being the same as the color cast of the image.
 Step 2:
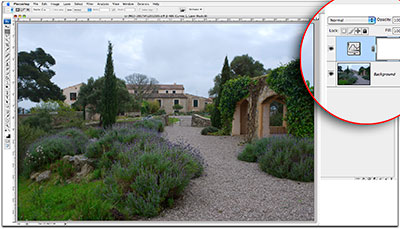
Make a new ‘Curves’ adjustment layer, and pick the grey eye-dropper tool from the curves dialog. Click anywhere in the image to neutralise the ‘average’ layer you created in the previous step.
 Step 3:
You have now effectively found the right corrections for the color cast. The only thing is that the ‘average’ layer is still in the way. We don’t need it however, so just drag that layer to the trash. You can now go to the white point and black point eyedroppers in the adjustment layer to set those points as well.
Note: This method does not work well if you have an image with a dominant color, such as a portrait shot against a colored background. In that case you can try the following adaptation: After you’ve copied the image, select a part of it using the rectangular selection tool (or any other selection tool). Try to select a part that is representative for a ‘normal’ photo. Blur only that part rather than the entire layer. Don’t forget to deselect before you add the Curves adjustment layer. If you don’t, the selection will become a mask.
2 Responses to Photoshop workshop Remove colorcast 2
Leave a Reply Cancel reply
This site uses Akismet to reduce spam. Learn how your comment data is processed.
Site Language / Taal
Select your language / Kies uw taal:
Info
This is the photography blog and website of Dutch photographer and author Johan W. Elzenga. All my images and text are my copyright and may not be used in any way without my prior consent.
360° interior panoramas


[…] is knap gedaan…Foto is naar mijn smaak ook wel iets te geel, en ook wat teveel magenta…Als je DEZE manier van kleurzweem verwijderen toepast en dan als de de laagdekking op +- 50% zet is die een […]
[…] vreemd. Heb hem eens ingeladen, en er ligt een kleine blauw/groen zweem over de foto. Heb het op deze manier eens even gecorrigeerd, en zelfs het landschap krijgt er nog mooiere kleuren door…Zeker de […]