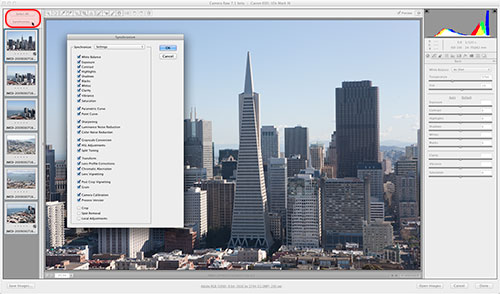
Photoshop Tip: Synchronizing adjustments in Camera RAW
Most people use Adobe’s raw-converter Camera RAW with one image at a time, but did you know you can use it with a series of images and synchronize the adjustments from one image to all the others? That saves you an enormous amount of time if you need to adjust many similar images, especially if you need to remove a few dust specks as well. Here’s how you do this. Select multiple RAW images (using shift-click or Ctrl-click / Cmd-click) in the ‘Open…’ dialog of Photoshop, or select them in Bridge and then choose ‘Open in Camera RAW’. You’ll get the Camera RAW dialog as always, but with a film strip on the left side showing all the images. Make your adjustments on one of the images, then click the ‘Select All’ button and then the ‘Synchronize’ button. You’ll get a dialog asking you which adjustments you want to synchronize.
Site Language / Taal
Select your language / Kies uw taal:
Info
This is the photography blog and website of Dutch photographer and author Johan W. Elzenga. All my images and text are my copyright and may not be used in any way without my prior consent.
360° interior panoramas

Categories
- Equipment (94)
- General (187)
- Software @en (108)
Archive


