Mobile phone? Go to my Adobe portfolio page!
This site is not optimized for viewing on a mobile phone

This is a Lightroom tutorial, not a Photoshop tutorial, but I hope it will be useful nevertheless. One of the most requested features for Lightroom is the ability to apply HSL-correction locally, through the Graduated Filter for example. Unfortunately, that is still not possible. The following method doesn’t completely allow local HSL-corrections, but it allows you to apply a local saturation correction of a single color, probably the most requested one.
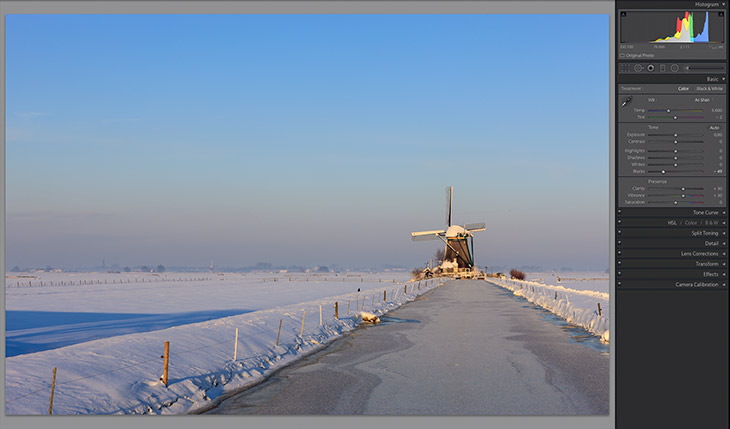 The problem with this images is the blue snow, especially in the shadow on the left. You could try to solve this by applying a graduated filter from the bottom to the top, that sets a warmer color temperature. However, that will also make the sunlit parts of the snow very yellow. It would be better to desaturate the blues only, and only in the part of the image that is below the horizon, because we don’t want to desaturate the sky. So how do we do that?
 Step 1:
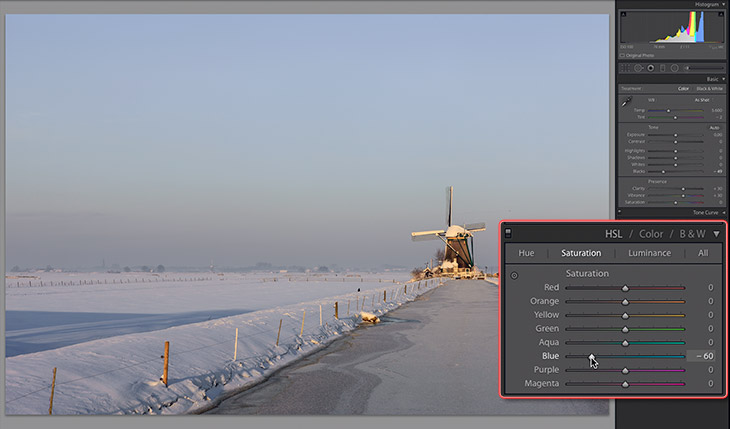
Go to HSL and desaturate the blue colors only. I used -60 Saturation for the blue colors only. This will obviously also desaturate the blue sky, but that is the trick we’re using. Instead of using a Graduated filter to desaturate only the blue color in the lower part of the image (which is not possible), we are going to use a Graduated filter over the top part of the image to correct for what we just did to the entire image.
 Step 2:
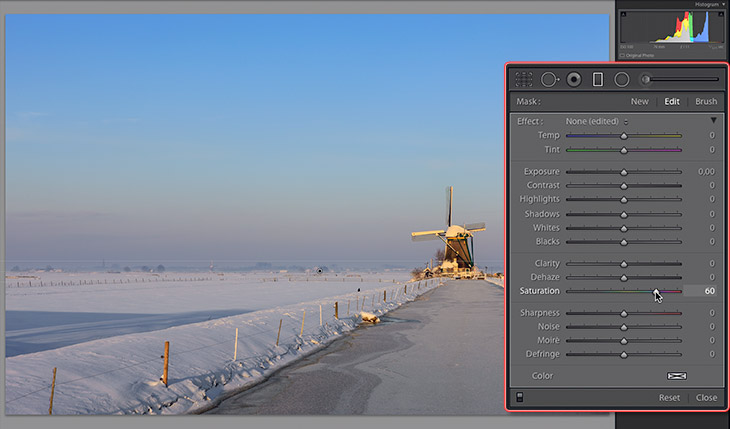
Draw a Graduated filter from the top down, and place the transition over the horizon. Keep that transition rather small. Now set this filter to +60 Saturation, the exact opposite of the -60 Saturation we used for blue in HSL. That will bring back the saturation of the sky, because the Graduated filter cancels out the HSL-correction in the sky.
 Step 3:
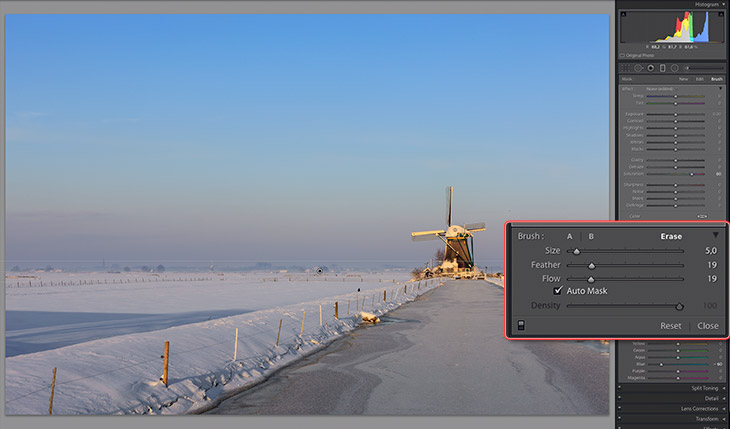
Other colours, such as the windmill and the snow on its roof, will now become oversaturated however. In this picture that is not really a problem, but sometimes you do want to correct this. While still in the Graduated filter, click on Brush, select Erase, check Auto Mask and erase the filter in those areas that have become oversaturated.
This is the photography blog and website of Dutch photographer and author Johan W. Elzenga. All my images and text are my copyright and may not be used in any way without my prior consent.
360° interior panoramas