Mobile phone? Go to my Adobe portfolio page!
This site is not optimized for viewing on a mobile phone

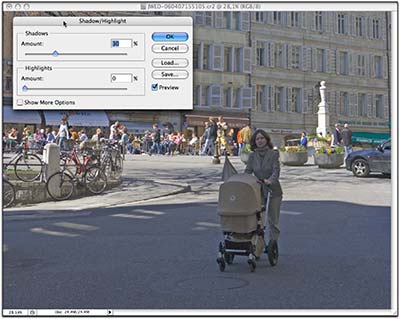 The ‘Shadows/Highlights’ option in Photoshop is very powerful, but in its standard setting it often gives an artificial effect. It can also introduce a color change if applied heavily. You would wish you could apply this tool only locally, and without color changes. You can with the following method.
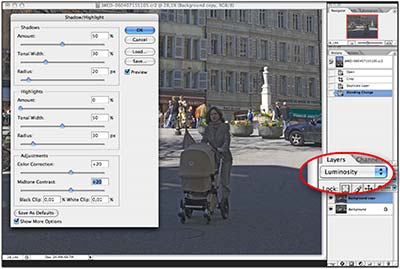 Step 1:
Make a copy of the image in a new layer and change the layer mode from ‘Normal’ to ‘Luminosity’. This will make sure that ‘Shadows/Highlight’ only works on the brightness of the pixels, not on the colors.
Use ‘Shadow / Highlights’ but click the ‘Show More Options’ button. This enables you to lower the ‘Tonal Width’ to 30, so that only the deeper shadows are affected. Set ‘Midtone Contrast’ to 20 to keep a bit more contrast in the midtone areas.
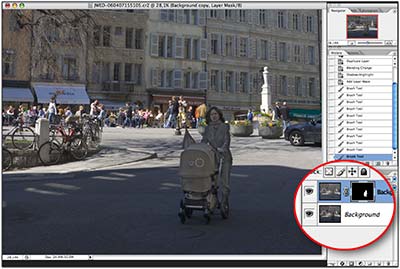 Step 2:
To change the effect from global to local, add a layer mask by choosing ‘Layer – New Layer Mask – Hide All’. You now get a mask that completely hides the effect, because the mask is black.
Take a white brush, and start painting in those areas that you want the ‘Shadows/Highlights’ to take effect. In this example, only the woman with the buggy was painted back in.
This is the photography blog and website of Dutch photographer and author Johan W. Elzenga. All my images and text are my copyright and may not be used in any way without my prior consent.
360° interior panoramas