How to replace a white sky
Replacing a white sky above roofs with small details like antennas with the blue sky of another image seems a complex task. How do you create a mask for all those tiny details? If you take advantage of the fact that the original sky is white or almost white, you don’t need a detailed mask at all and this task is actually quite simple.
 Step 1:
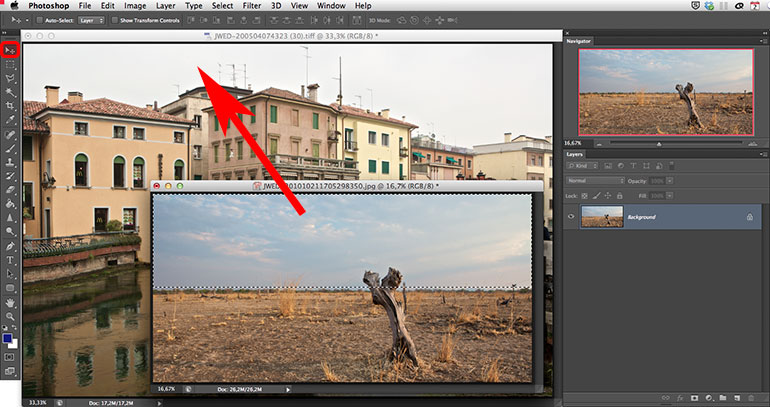
Roughly select the sky of the ‘donor’ image, switch to the Move Tool and drag & drop the selected sky onto your image. Move the sky to its position.
 Step 2:
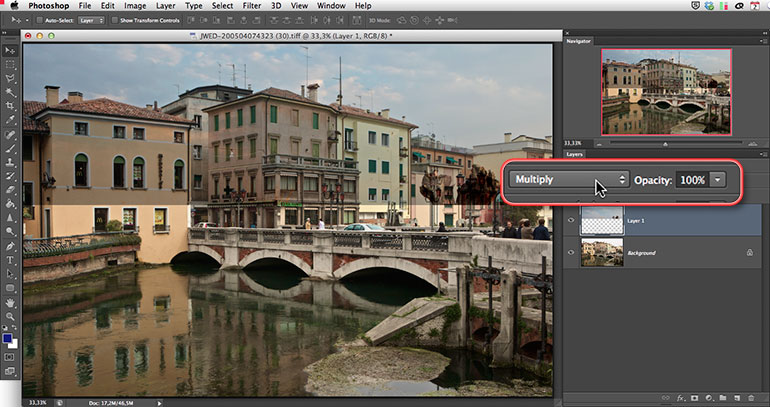
Because the original sky is (almost) white, we can use this to our advantage. Change the Blending Mode of the new layer from ‘Normal’ to ‘Multiply’. This will add the pixels of both layers together, so you will now see the buildings and the antennas shine through the new sky.
 Step 3:
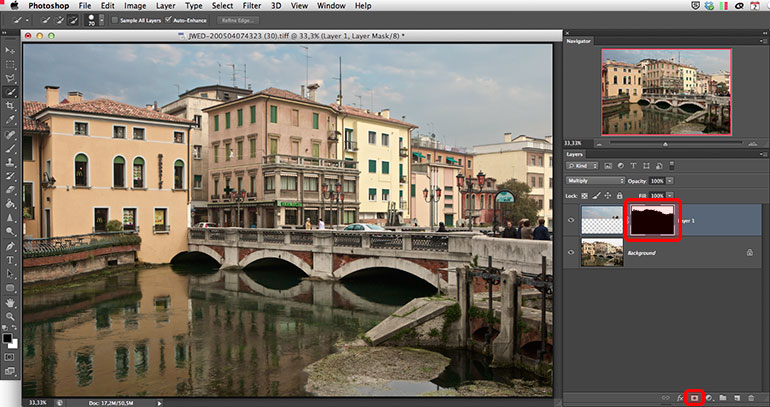
We now only need a mask for the buildings, as the antennas are already visible. Again we can make use of the fact that the sky is (almost) white. Select the background layer, switch to the Quick Selection Tool, and select the white sky using this tool. That should be very easy. If parts of the buildings are selected too, deselect them by clicking on them while holding the Alt-key. With the sky still selected, click on the layer icon of the upper layer so that it is now selected. Now click on the ‘Add Layer Mask’ icon at the bottom of the Layers Palette while holding the Alt-key again. This will create a mask of the non-selected area, so the buildings are now masked perfectly and the sky is no longer visible through them.
 Step 4:
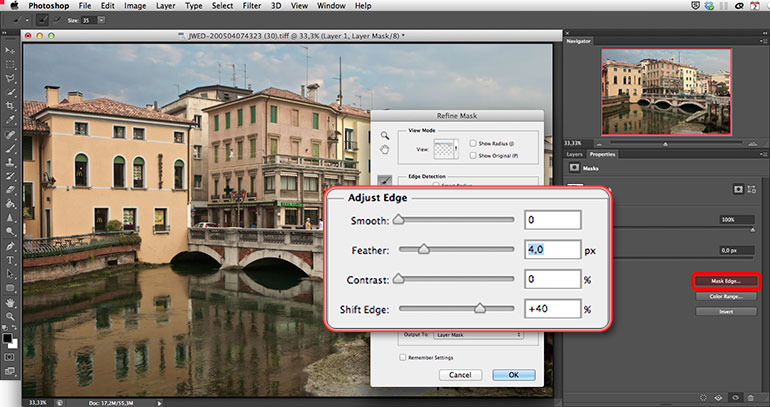
The edges of the mask may be just too sharp, causing some halos around the edges of the roofs. If that is so, activate the ‘Properties’ palette and click ‘Mask Edge’. In this dialog you can soften the edges of the mask by using a feathering of a few pixels. To avoid creating an even bigger halo this way, also increase the size of the mask a little by using a +40% edge shift.
2 Responses to Replace white sky
Leave a Reply Cancel reply
This site uses Akismet to reduce spam. Learn how your comment data is processed.
Site Language / Taal
Select your language / Kies uw taal:
Info
This is the photography blog and website of Dutch photographer and author Johan W. Elzenga. All my images and text are my copyright and may not be used in any way without my prior consent.
360° interior panoramas


Beste Johan,
Een boom planten tip Photoshop kan ik niet meer terugvinden.
Graag je reactie.
Mvg.
Peter
Die tip heeft ook nooit op mijn website gestaan. Dat was een artikel in een van de tijdschriften waar ik voor werk. Je doet dat via ‘Filter – Render – Boom’.