Mobile phone? Go to my Adobe portfolio page!
This site is not optimized for viewing on a mobile phone

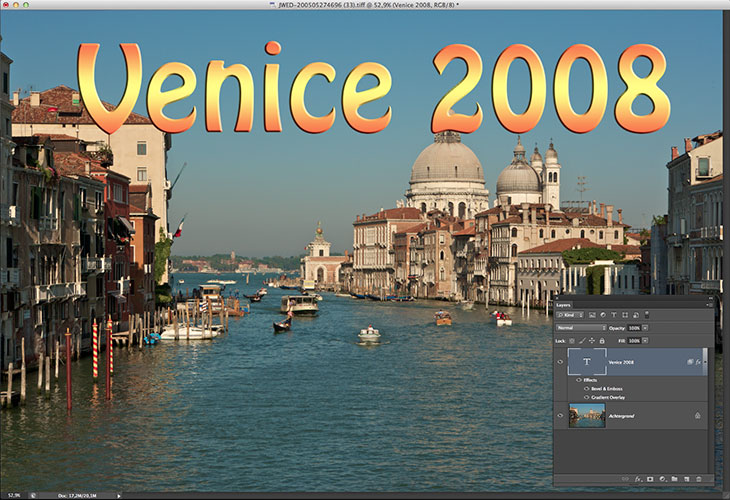
If you want a text to appear behind buildings, you’d probably make a mask for the text layer. Making such a mask is not only time consuming, it can also be quite tricky if the buildings have lots of fine details. In many cases, especially if the sky behind the buildings is blue, you can use another technique that is much more powerful and a lot easier: “Blend if…”.
 Step 1:
Create your text and give it a nice color and some ‘depth’, using layer styles. It’s best to move the text to its final position before you start using the advanced blending technique, but it’s not really necessary. It also works if you move the text afterwards.
 Step 2:
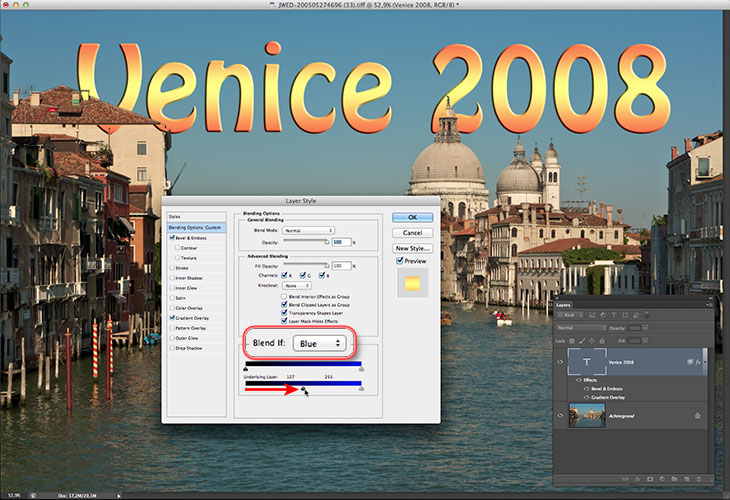
Get the layer styles dialog (again) by double clicking next to the text layer icon. Go to the Blending Options and to Blend if at the bottom. This option determines if the layer pixels are visible or invisible, based on their brightness or color. Or on the brightness/color of the corresponding pixels in the layer below. By choosing ‘Blend if: Blue’ and moving the lower left slider inwards, we can say to Photoshop that the text should become invisible if the pixels below that text are not blue.
 Step 3:
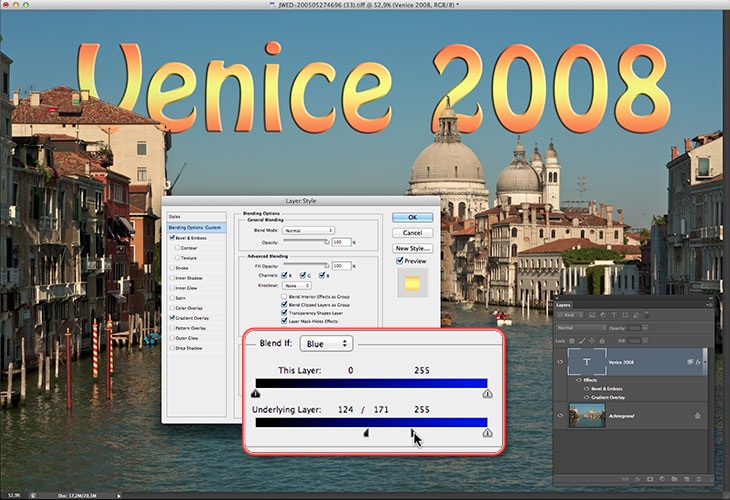
As you can see this works very well and gives an almost perfect blending right away. There are two small problems to address. First, the blending is a bit abrupt, especially over the church dome. You can make the transition a bit smoother by pressing the Alt-key and then dragging one half of the slider. The slider will split into two halves, and a smooth transition zone of partially transparent pixels appears between those two halves.
 Step 4:
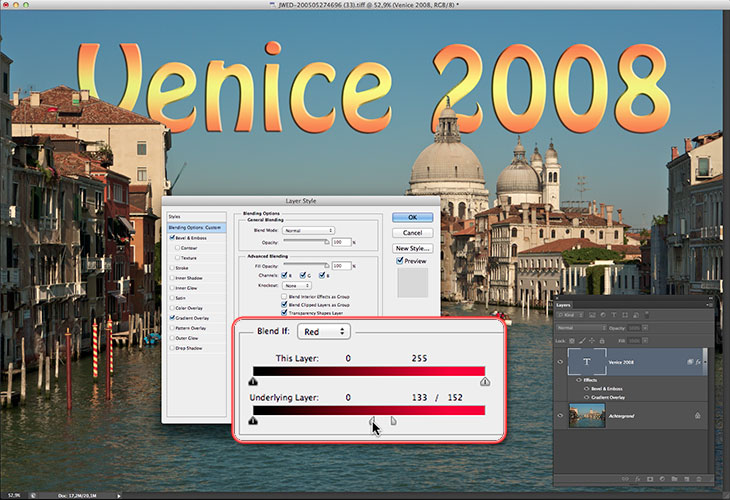
The second problem is that the text still shines through part of the building on the left. Apparently there is some blue tint in those pixels, making the blend imperfect. We solve this problem with a second ‘Blend if’ command, this time for the color red. By moving the lower right slider this time, we tell Photoshop that the text layer must also become transparent if the pixels in the layer below do contain a lot of red. Because the walls of the building clearly do contain red, this will remove the last remnants of text completely. Again, we make a small transition area to get a smooth transition on the edges of the building.
This is the photography blog and website of Dutch photographer and author Johan W. Elzenga. All my images and text are my copyright and may not be used in any way without my prior consent.
360° interior panoramas