Mobile phone? Go to my Adobe portfolio page!
This site is not optimized for viewing on a mobile phone

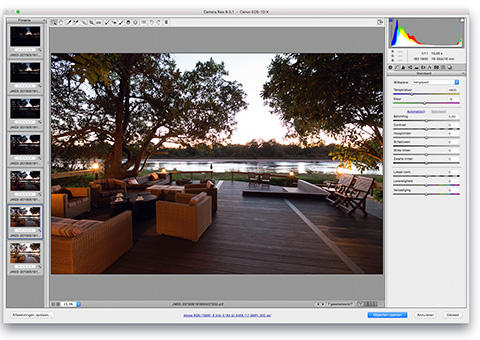
Adobe Photoshop contains Adobe Camera RAW to open raw images, but did you know that you can synchronize the settings for one raw image to a whole batch of images? You can even merge the images to a panorama or an HDR image, just like you can in Adobe Photoshop Lightroom. All you need to do is select a number of raw images in the Photoshop ‘Open file’ dialog, or select them in Bridge and choose ‘Open in Camera RAW’. You will get the Camera RAW dialog, but now there is a film strip on the left side of that dialog. On the top right corner of that film strip is a small icon with a few dashes, indicating a fly-out menu. From that menu you can select all the images, synchronize the settings of the primary selected image to all the other images and/or merge them to panorama or HDR.
This is the photography blog and website of Dutch photographer and author Johan W. Elzenga. All my images and text are my copyright and may not be used in any way without my prior consent.
360° interior panoramas